Local Artist Shawnacy Kiker Perez
Shawnacy is a poet, fiction writer and mother; teaching English, Spanish and Creative Writing at Cornell College, Kirkwood Community College, and the University of Iowa’s International Writers House.
Class 4 of 6, Prompts 8 - 12
Continue your Art Journaling exploration with Shawnacy as your guide. This week students are prompted to; explore layering a background with mark making and images, practice drawing something observed outside, make a surprise addition to a page with a fold out extension, create a monster, and experiment with mark making.
Prompt 8 - Layering
By adding various layers to your page you get depth, richness and interest.
Supplies:
- Paints
- Water container
- Paint brushes
- Expired gift card
- Texture tool, or a mark making tool like sponges, cardboard tube, bubble wrap, etc.
- Pens
- Oil Pastels
- Images and/or words you have gathered
- Odds and ends like tissue paper or other papers
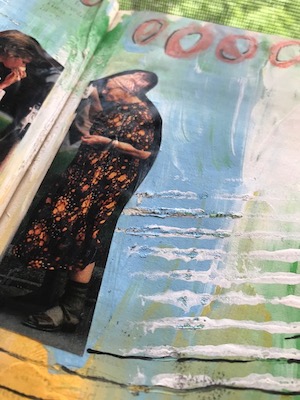
Directions:
Begin by painting a background with colors you want to work with, Don’t worry about how it looks too much, it is just the first of many layers! Once that has dried (a hairdryer can speed up the process) you will print on top of that page with anything you have laying around, bubble wrap, corrugated cardboard, a sponge. Repeat as much or little as you would like. From here you can add most anything to continue building your page. Go ahead and do what inspires you; add an image or images, some writing, drawings, tissue paper, or found words.
Click on the title of the prompt to go to the lesson on YouTube
Prompt 9 - Go Outside and Draw
Materials:
- Paper, journal page, sketchbook
- Pencil or Pen
Directions:
Sketch something you see outside; a tree, a bush, a flower, or an animal. You can use it in your Art Journal on another page, or just do it to practice your drawing skills.
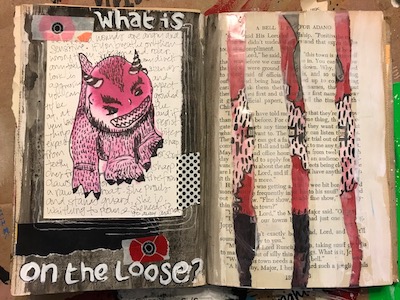
Prompt 10 - Accordion Book Fold
Materials:
- Card stock or other heavy paper
- Bone Folder or expired gift card (brayer)
- Paints
- Water container
- Paint brushes
- Paint - watercolor or acrylic
- Masking tape or washi tape
Directions:
This is one example of something you might do to change a page in your book. To make an accordion fold addition take a piece of sturdy paper or card stock and cut it to the desired length. Fold it in half aligning one corner and the edge, press back toward the fold to create a nice even edge. Draw the bone folder or gift card along the folded edge to form a good crease. Next you will make the two accordion sections. Fold one open edge back toward the folded edge in the same manner as above, making a good crease. Do the same thing with the other side. Shawnacy added background color with watercolor and you can do whatever inspires you. Decide where you want your added accordion to unfold from the page and tape the desired edge to the back of the page. Try to get the tape the exact size of your paper. Then tape it to the front of the page using masking tape. Washi tape is fun because it is already patterned and you don’t have to paint it. You can incorporate the added tape to the pages using paint if you wish. Embelish your new addition with found words, drawings, or writing.
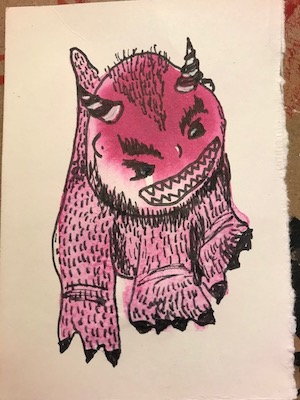
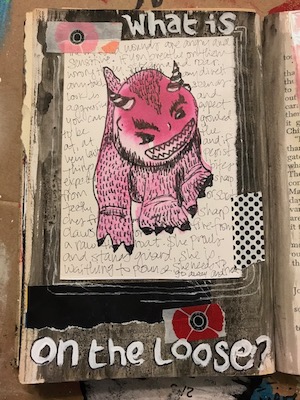
Prompt 11 - Monsters
Monsters can represent something that bothers us, something we are scared of or an overwhelming feeling, Think about a monster you want to define; what qualities does it have, what color is it? Giving it a shape and making it a character can help us relate to it, so it's not so scary or overwhelming.
Supplies:
- Water container
- Paint brushes
- Colored India Ink - Shawnacy uses Bombay Inks
- Paper - sturdy mixed media paper or card stock
- Cut the paper to a smaller size than the page you will put it on.
- Straw
- Pens
Directions:
Once you have the shape of your monster in mind, dip your paint brush in plain water and draw that shape on your paper. Dip it again to add more water if your brush gets dry. Once you have drawn that shape with water drop a bit of ink onto the wet area. The ink will bloom and spread into the area you got wet. You can change the shape it is making by using a straw and blowing on the ink to move it around the page or lift one edge of your paper to help it spread in a certain direction. Let this dry and then look at the shape from all angles to see if your original idea is influenced by the happy accident of how it turned out. Then you will turn this shape into your monster character. Use a pen to define your monster even more. Add texture to it. Does it have scales or fur? See the Markmaking video to see some examples of texture. Once you have completed your monster add it to a prepared (painted or layered) page. Journal about it and add other markmaking elements if you wish.
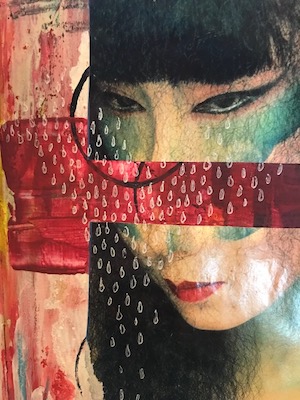
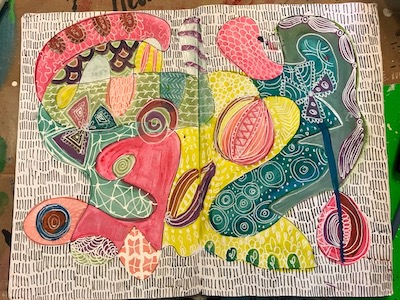
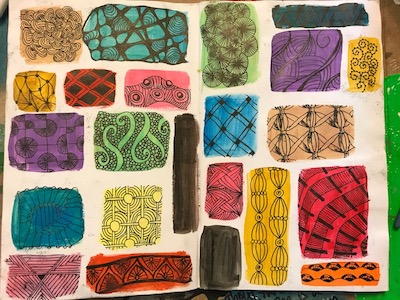
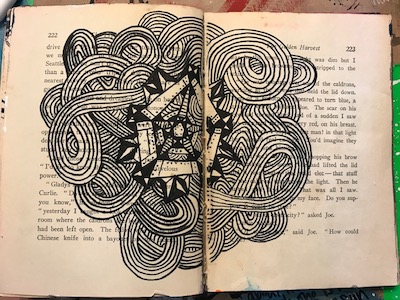
Prompt 12 - Markmaking
Shawnacy has shown examples of this in other prompts and it is a great way to add an element that unifies your page, giving it some cohesion. Markmaking uses small repeated patterns and helps bring together parts of your page that don’t seem to go together. These repeated patterns overlap the various elements on your page. They can be made with pens, paint, your mark making tools; corrugated cardboard, bubble wrap, etc. Another kind of makrmaking you may be familiar with is Zentangle or Zendoodle. Shawnacy made a sampler page of various textures and refers to it when she needs an idea for a pattern to use.
Materials:
- Prepared Art Journal Page
- Pens - fine tip sharpie, paint pens of various colors
- Watercolors or acrylic
- Paint brushes
- Water container
Directions:
To make the full page of mark making from the video start with a prepared page as explained in the first Intro to Art Journaling lesson. Use pen to draw a doodle that covers the page and has overlapping or intersecting lines. Then color in the spaces with various colors using watercolor or acrylic paints. Then add your marks, use lines or Zentangle patterns. Use colored or white paint pens. If making a whole new page feels too ambitious add some marks to other pages you have already created, or make the sampler page.
Additional art journaling classes and prompts can be found here:
Share your work and stay connected!
We are curious to see your project! Upload photos in the comment section below. If you have trouble, or want to share a short video, email us at info@eiaaprogram.org. Leave your school name in the comment box and we will share images with your school!
We want to stay connected to our creative students when we get back to the new normal. While you are here, learn more about the Eastern Iowa Arts Academy. While we don't have much taking place in real space/time during the pandemic, we will get back to our regular live and in-person classes. When we do, we'd love to have you as a member!